Friday 8 May 2015
Sunday 17 August 2014
My airbrushing equipment
Mini air Compresor model AS06 (made in China) with air filter and air pressure gauge.
Paschee Talon double action gravity type airbrush.
Vega double action siphon type airbrush.
Paschee single action siphon type airbrush.
With these three airbrushes I can applly acrilics, enemels, varnishes and make any type of painting and camo on my models.


Paschee Talon double action gravity type airbrush.
Vega double action siphon type airbrush.
Paschee single action siphon type airbrush.
With these three airbrushes I can applly acrilics, enemels, varnishes and make any type of painting and camo on my models.


Saturday 16 August 2014
Applying Future to Clear Plastic Parts
Here in Argentina the Future wax doesn´t exist with that name. The substitute is Blem Acrilic Floor´s Bright (Blem Brillo Acrílico para pisos). It isn´t the same product but it works the same. I only apply it with a soft flat brush, never with the airbrush.
This is the product here in Argentina.

This is the product here in Argentina.
Applying Future before decalling
I gave at least five or more coats of the product until the surface looks like glass, it depends of the type of paint you have used. Be carefull to wait until the coat is well dried before applying the next one. Never use the airbrush, only use a soft flat brush. The result is excellent.
Here a picture where you can see the brightness and the result with the decals, no silvering at all.

Here a picture where you can see the brightness and the result with the decals, no silvering at all.
Monday 29 July 2013
Masking tips
Masking canopies:
Tamiya masking tape and adhesive-backed foil (such as Bare-Metal Foil) is thin and works well. My favourite is the Tamiya masking tape.
First cut the tape in thin stripes and place them against the frames, then mask the rest between the stripes taking care to overlap them.
After masking I spray the interior color of the canopy frame on the outside and follow with the exterior frame color. This is easier than trying to paint the canopy inside and out. Remove adhesive residue with alcohol on a cotton swab.
One more tip: Dont forget to mask the inside of the canopy to block overspray.

Painting bombs without decals:
The problem with painting rings on bomb noses is masking a sharp line on a compound curved
surface.
Masking with tape or applying solidcolor decal film doesn't work well because you're trying to apply a flat material to the cun'ed surface. To resolve this, first, paint the front end of the bomb gloss yellow and allow it to dry. Then apply a liquid masking agent over the yellow and let it dry. Next, carefully chuck the bomb in a variable-speed electric drill (don't turn the chuck too tight or you'll crush the plastic.) With the drill operating at low speed, bring the edge of a sharp modeling knife (Xacto blade
nº 10) to the front and rear edges of the area to remain yellow, cutting through the masking agent.
When done, peel away the masking agent at the nose tip and from behind the yellow ring.
Paint the entire bomb olive drab and when dry remove the masking agent from the yellow ring.

Painting circumferences:
The best way to mask a circumference is to use frisket paper, sometimes called frisket film. This is a thin, paper-backed, selfadhesive material used by artists to mask airbrush illustrations. Look for it at artsupply stores. You can use a draftsman's compass with a cutting blade in place of the pencil.
First, cut the mask for the outside of the circle. Then cut another circle smaller in radius. Apply the frisket outline on the part to be painted, then place the smaller circle within that mask, making sure it's centered. When you're satisfied with the position of the masks, burnish their edges with your fingernail.
Now you are ready to paint, preferably with an airbrush. If you hand brush, take
care to keep the paint from creeping under the frisket.
Let the paint dry and remove the masks.
Painting wheels:
Instead of using a circle template to cut masks, use the template as a mask.
Paint the tire black or dark gray with an airbrush and let it dry. Now prepare the paint for airbrushing the rim of the wheel.
Find the circle on the template that is closest to the corrcct diameter of the rim and hold the wheel behind the template, only the rim must show through the template. Spray through the template; remeber that you may have to cover the adjacent holes in the template.
Tamiya masking tape and adhesive-backed foil (such as Bare-Metal Foil) is thin and works well. My favourite is the Tamiya masking tape.
First cut the tape in thin stripes and place them against the frames, then mask the rest between the stripes taking care to overlap them.
After masking I spray the interior color of the canopy frame on the outside and follow with the exterior frame color. This is easier than trying to paint the canopy inside and out. Remove adhesive residue with alcohol on a cotton swab.
One more tip: Dont forget to mask the inside of the canopy to block overspray.

Painting bombs without decals:
The problem with painting rings on bomb noses is masking a sharp line on a compound curved
surface.
Masking with tape or applying solidcolor decal film doesn't work well because you're trying to apply a flat material to the cun'ed surface. To resolve this, first, paint the front end of the bomb gloss yellow and allow it to dry. Then apply a liquid masking agent over the yellow and let it dry. Next, carefully chuck the bomb in a variable-speed electric drill (don't turn the chuck too tight or you'll crush the plastic.) With the drill operating at low speed, bring the edge of a sharp modeling knife (Xacto blade
nº 10) to the front and rear edges of the area to remain yellow, cutting through the masking agent.
When done, peel away the masking agent at the nose tip and from behind the yellow ring.
Paint the entire bomb olive drab and when dry remove the masking agent from the yellow ring.

The best way to mask a circumference is to use frisket paper, sometimes called frisket film. This is a thin, paper-backed, selfadhesive material used by artists to mask airbrush illustrations. Look for it at artsupply stores. You can use a draftsman's compass with a cutting blade in place of the pencil.
First, cut the mask for the outside of the circle. Then cut another circle smaller in radius. Apply the frisket outline on the part to be painted, then place the smaller circle within that mask, making sure it's centered. When you're satisfied with the position of the masks, burnish their edges with your fingernail.
Now you are ready to paint, preferably with an airbrush. If you hand brush, take
care to keep the paint from creeping under the frisket.
Let the paint dry and remove the masks.
Painting wheels:
Instead of using a circle template to cut masks, use the template as a mask.
Paint the tire black or dark gray with an airbrush and let it dry. Now prepare the paint for airbrushing the rim of the wheel.
Find the circle on the template that is closest to the corrcct diameter of the rim and hold the wheel behind the template, only the rim must show through the template. Spray through the template; remeber that you may have to cover the adjacent holes in the template.
Tuesday 6 November 2012
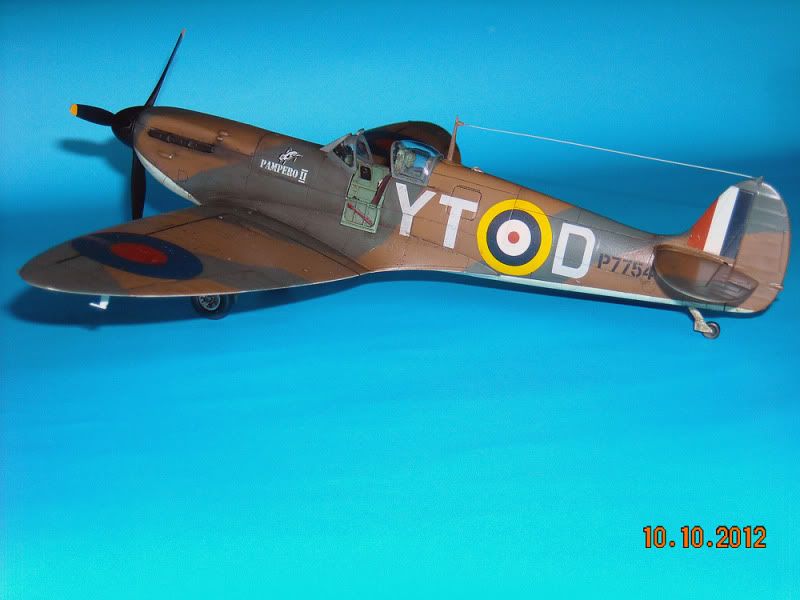
Airfix Spitfire Mk Vc (on the workbench)
This is my new Spitfire project. The kit is the Arfix with new scribed panel lines on the wings, the fuselaje is the old one. The general shape looks very good as a Spitfire Mk Vc. I love old Airfix Spitfires.

Gral. building is finished. It took a lot of job, specially the underside fuselage on the joint with the wings. I used cyanoacrilate to fill the gaps and a lot of sanding was needed. To avoid the gaps on the join of the uper parts of the wings with the fuselage, I glued them first and then I glued the downpart of the wings. I´m satisfied with the result. it worked well, no gaps are visible.
I replaced the kit´s seat with a resin one from Ultracast. The backseat armour was made from scartch. I didn´t use the cannon barrels from the kit, I found a resin pair of the old Occidental Mk IXc kit in my sapre box, they look more real. The wing is the typical C configutarion with the cannon inboard.
I cut the fuselage to place the door in the open postion and sanded the navigation light on the spin and made a little hole to place a clear plastic position light.
I´m in doubt if the spinner and propeller (De Havilland) that I used are the correct, in the picture it seems that the propeller is a Rotol propeller and the spinner is more pointy.


I´ll go with a RAAF 79 Sqn Spit, October 1944, using the kit decal set.
I satrted with the new scheme, painting is finished. For the upersides I used Umbrol 149; Humbrol 34 for the tail, horizontal stabilizers, cone of the propeller and leding edges of the wings; and for the undersides a mixture of Azurre Blue and White (80%-20%).
When all well dried I satrted with the coats of Future.
Here some pics.


After severall coats of Future I started the decalling process. The decals are from the kit and gave me some trouble to avoid silvering but to solve that I applied the decals over a coat of wet Future instead of wáter and that was the solution, the only thing to take care with this is that you have to work very quickly because the Future dries fast.

Decaling and weathering finished.


Tuesday 23 October 2012
Spitfire Mk Ib (on the workbench)
92 Sqn December 1940
This is my new project. A Spitfire Mk Ib. This time I will represent the aircraft "in flight" with retracted landing gears. The kit is a mix of a Mk Ia fuselage an the wings of a Mk Vb, both are Tamiya brand. I deleted the reinforcement strips of the wings that comes with the Mk Vb (Tamiya). After the general assembling, I applied a coat of primer ( Mr. Surfacer 1200).
Here some pics. More on the way...


I decided to change the scheme, it will be with the all the undersides sky, as from August 1940 untill November 1940. Upersurfaces RAF Dark Green and RAF Dark Brown camo with Sky band on the fuselage and spinner.
Now I begun with the painting process. The camo is the one for an even serial number Spitfire. Here some pics.
I used Humbrol and Model Master Enamels. The pilot is from and old Airfix Spitfire kit.
I used Humbrol and Model Master Enamels. The pilot is from and old Airfix Spitfire kit.


I broke the antena mast on the tail I fixed it but I´m not happy with the result. I´ll do it .again...
I made the antena mast from scrath, now it looks ok. I leave a little space to insert the cable.
The decaling is going well, the kit decals (Tamiya) are excellent. I´m using Microsol.


Undersides with retracted wheels.I made the antena mast from scrath, now it looks ok. I leave a little space to insert the cable.
The decaling is going well, the kit decals (Tamiya) are excellent. I´m using Microsol.


Decaling finished. Next general weathering.

The enhaicing and weathering of the panel lines was done with Eding microfiber 0.1 mm with permanent ink and artist oil washes.


Monday 15 October 2012
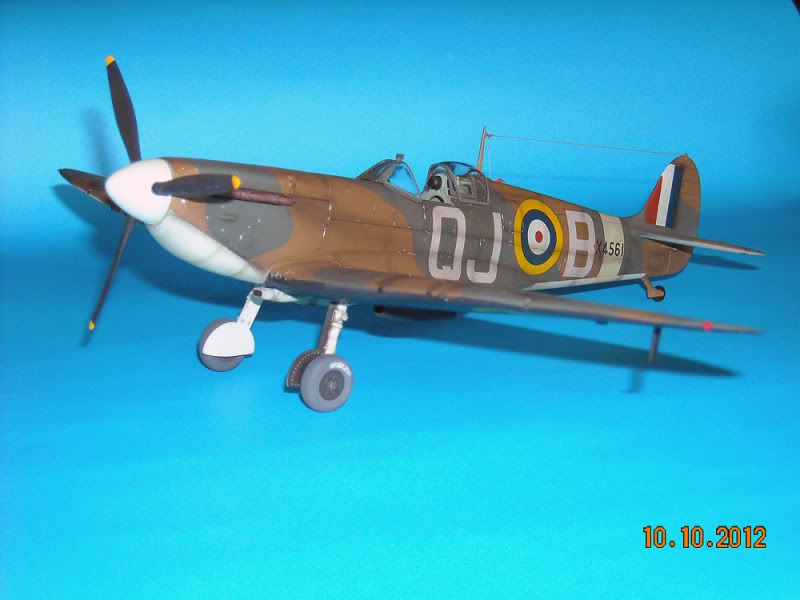
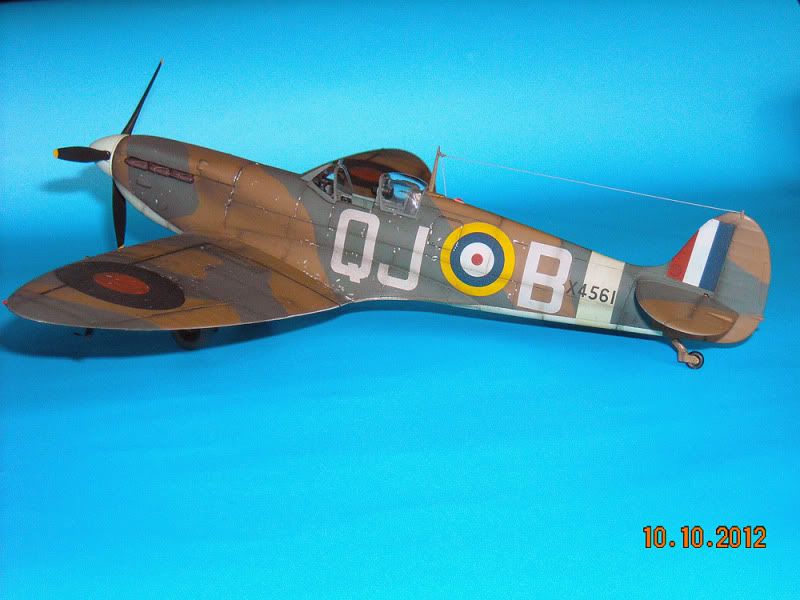
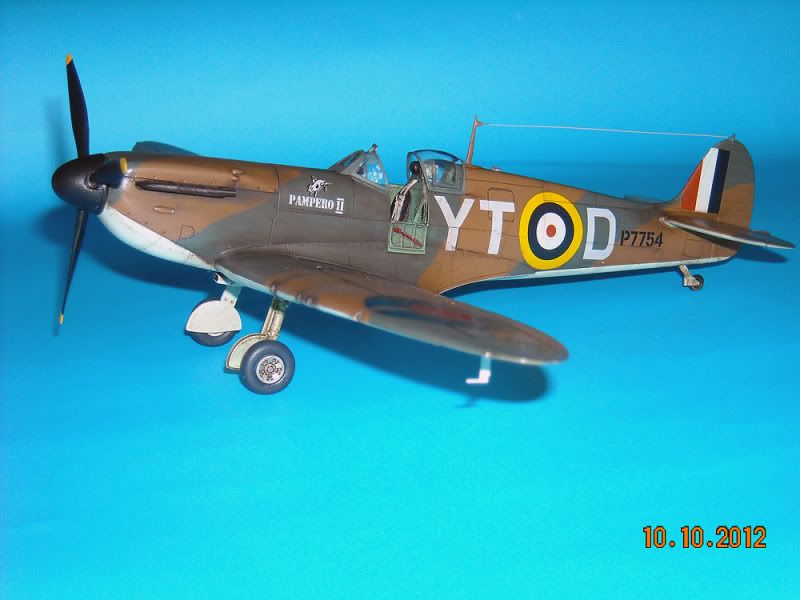
My Spitfire Collection
Here are some pics of my Spitfires. It´s a never ending collection, I´ll continue to add more Spitfires. All are in 1/48 scale.
Mk Ia 610 Sqn 1940
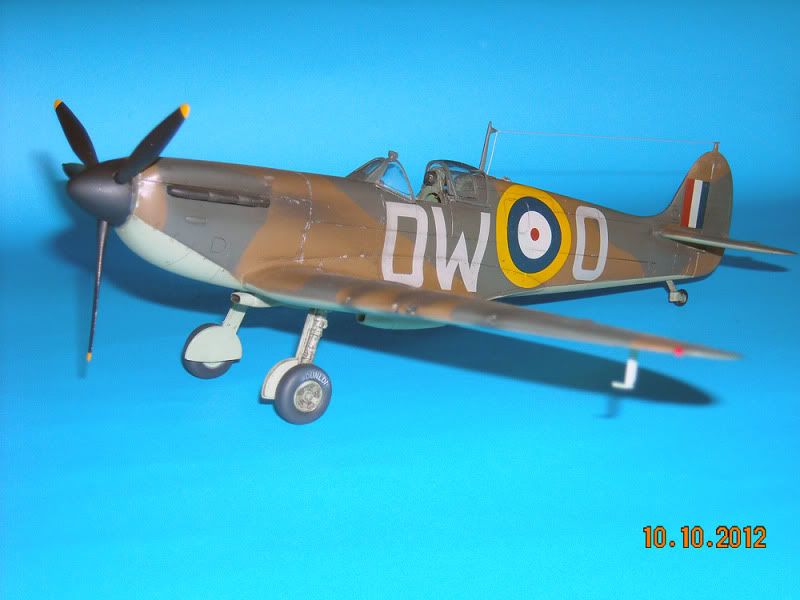

Mk Ia 92 Sqn 1940
Mk IIa 65 Sqn 1940
Mk Vb 316 Spn 1942


Mk Vb 417 Sqn 1942


Mk Vb 601 Sqn 1942


Mk Vb 602 Sqn 1942


Mk IXc 316 Sqn 1943


More on the way...
Friday 12 October 2012
F 4J Phantom II
This time I´m building a F 4J - VMFA 232 "Red Devils".


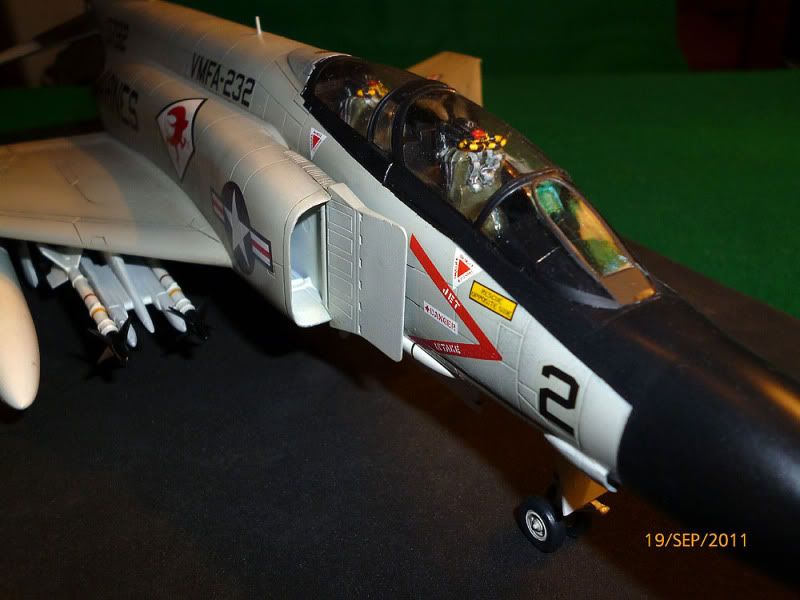
To mask the cannopie I used Tamiya masking tape.

Decaling with a Microscale aftermarket decal sheet. Aircraft is of VMFA 232 - Red Devils - USMC. I used Microsol to in the decaling process.


To enhace the panel lines I gave a wash of black oil piant diluted in tupertine.


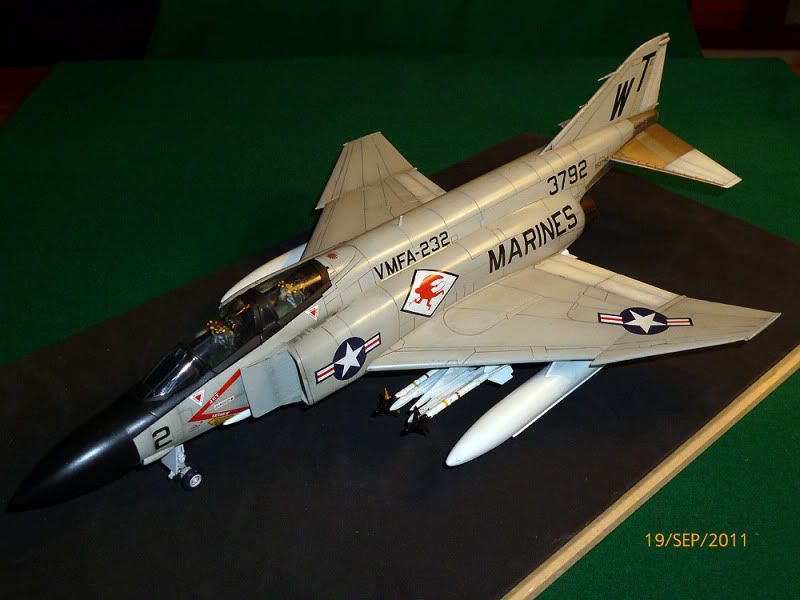
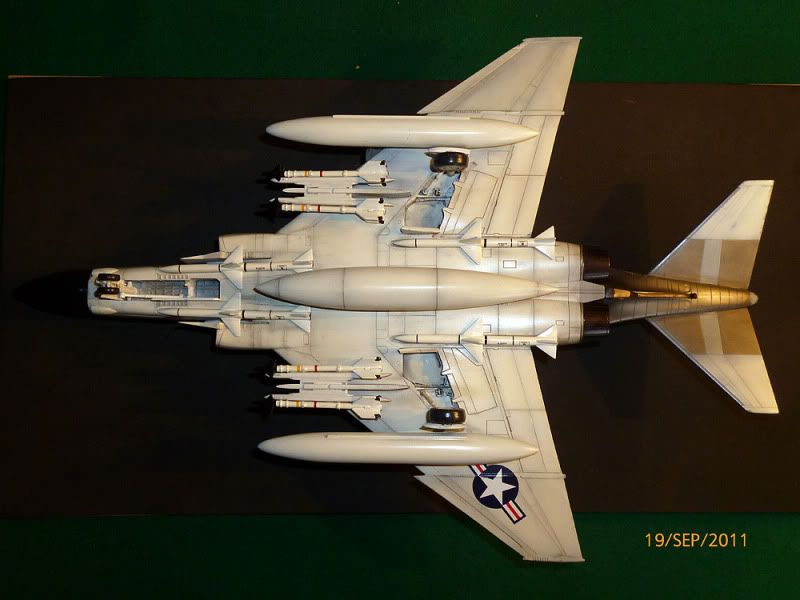

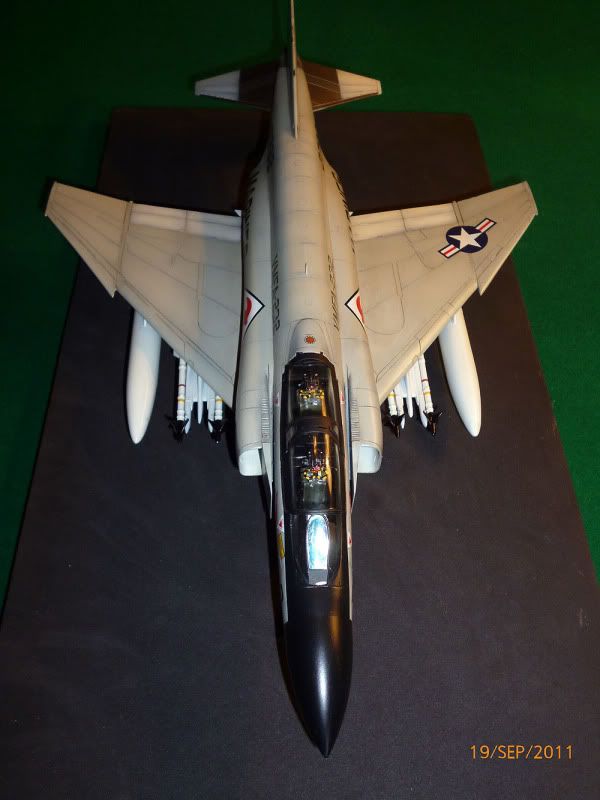
The kit is the old but good ESCI in 1/48 scale, Bicentenial model, so I had made some modifications to represent a F 4J because the Bicentenial is a F 4B type.
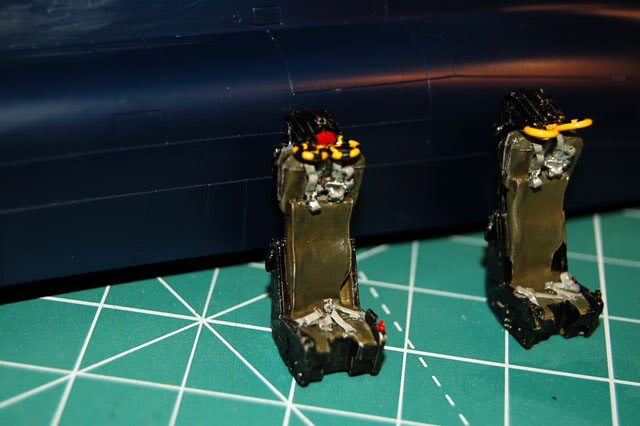
I added the internal & external pylons, the external fuel tanks & the missiles, all of these didn´t come with the kit. The seats are KMC #485050 aftermarket set.
After the building process I used Mr. Surfacer 1200 for general priming. Paints are Humbrol Enamels
(nº 129 - nº 130 - nº 85) and Model Master Metalizers (Burnt Metal & Stainless Steel).

To mask the cannopie I used Tamiya masking tape.
Decaling with a Microscale aftermarket decal sheet. Aircraft is of VMFA 232 - Red Devils - USMC. I used Microsol to in the decaling process.
To enhace the panel lines I gave a wash of black oil piant diluted in tupertine.
Subscribe to:
Posts (Atom)